
1.1 About SendQuick Pte Ltd
SendQuick™ develops and offers enterprise mobile messaging solutions to facilitate and improve business workflow and communication, and is widely used in areas such as IT alerts & notifications, secure remote access via 2-Factor Authentication, emergency & broadcast messaging, business process automation and system availability monitoring.
In addition to functionality, SendQuick’s messaging solutions have also been developed with other key features in mind. These include security and confidentiality of company information, and ease in mitigating disruption during unplanned system downtime such as that arising from cyberattacks.
1.2 About SendQuick Cloud
SendQuick Cloud is a cloud based Software-as-a-Service (Saas) application to monitor and notify for cloud based incidents with omni-channel messaging capability. It has ability to monitor using ICMP Ping, Port check and URL check. It has policy based notifications using Email and Webhook, supporting any applications as well as Cloud Providers like AWS, Azure, Alibaba Cloud, Google Cloud and Oracle. Given the above integration methods, SendQuick Cloud is able to work with any applications to send notifications. Supporting notification channels include SMS, Telegram, Slack, Facebook Messenger and others. Lastly, there is Roster for messaging based on duties and time frame for each recipients, reducing alert fatigue.
1.3 Purpose of Document
This document is a guide on how to integrate SendQuick Cloud with Azure Monitor to send message notifications and alerts. In this guide, we will be using SendQuick Cloud for the integration.
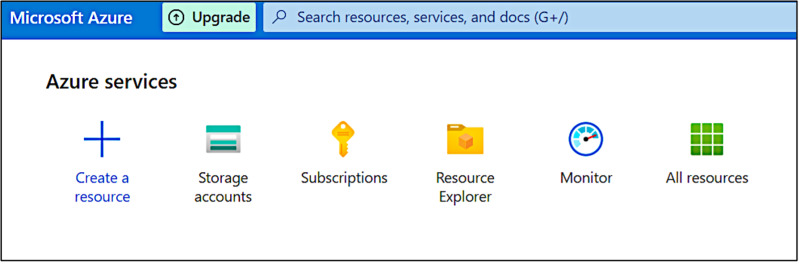
Azure Monitor is accessible from the Azure Portal. You will need to login to Azure Portal and select Azure Services and is presented with all the Azure Services options. Select Monitor. You will need to configure the Alert function as found in the Left Menu and shown in the diagram below.
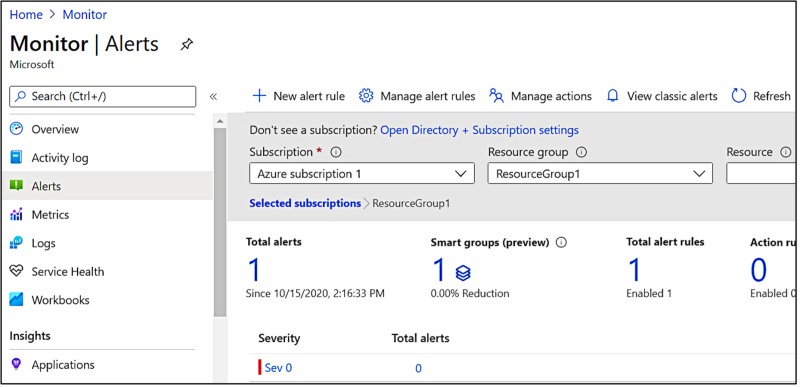
In Azure Monitor, you can send Alert via Email (SMTP) and Webhook (HTTP) method. This document will explain both methods in details in the following sections.
2.1 Email Filters in SendQuick Cloud
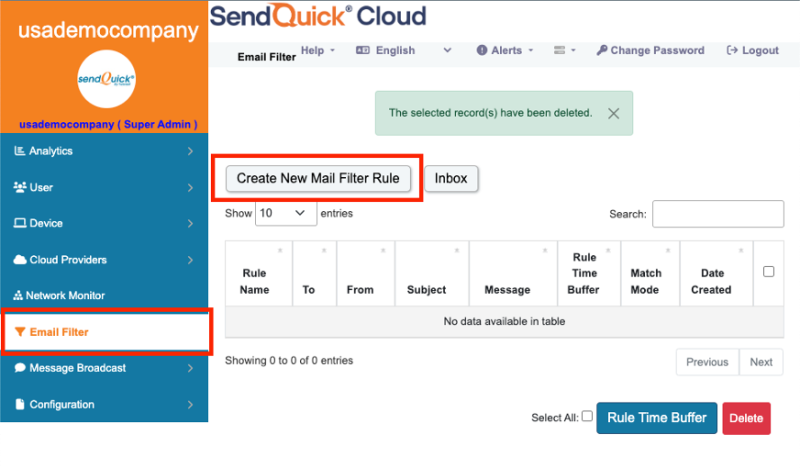
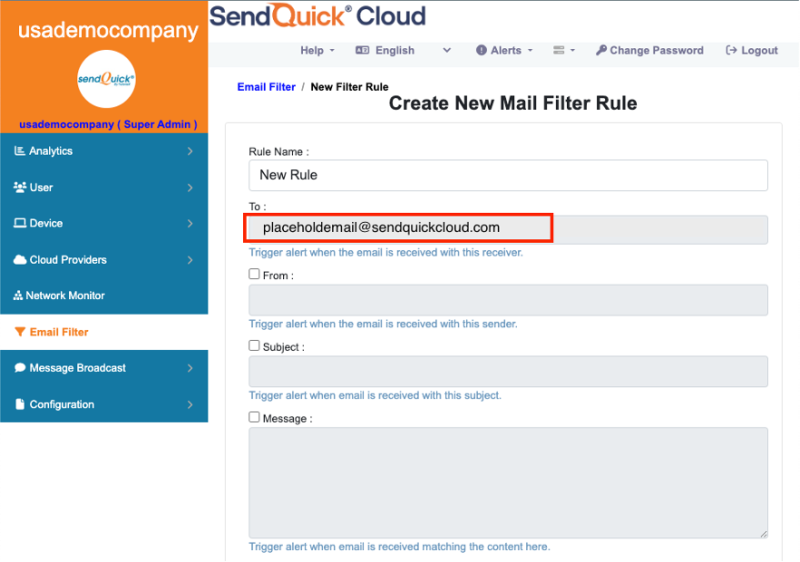
SendQuick Cloud can receive any emails (SMTP) from any applications, apply the configured filters (policies) and if the condition matches, messages will be sent to the recipients. When starting to configure, create an account in SendQuick Cloud and go to Email Filter (left Menu) and Create New Mail Filter Rule. You will be presented with the interface as shown below.
You will notice the Email Address TO as the first Policy item. The email address is pre-assigned by SendQuick Cloud and will follow the name of your account name. This email address cannot be changed and will be used to configure in Cloud Monitor as explained in section 3.1.
2.2 Cloud Provider in SendQuick Cloud using Webhook
The second method to integrate between Cloud Monitor and SendQuick Cloud is using Webhook method. This is via an Application Programming Interface (API) where the event information is sent to SendQuick Cloud and SendQuick Cloud will process and check against the pre-configured policies (conditions). If the conditions are met, it will trigger an alert to the assigned users.
In summary, the flow is as below:

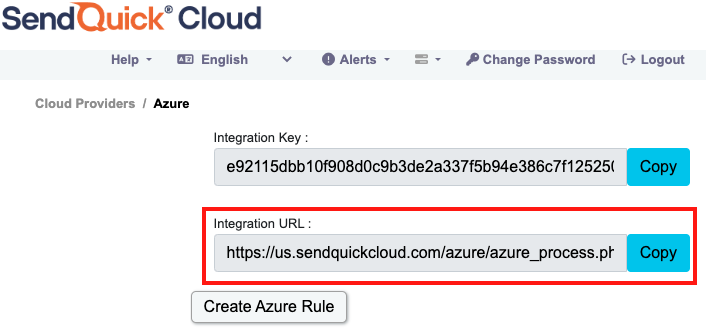
The webhook to send to SendQuick Cloud is found on the Service Configuration for Cloud Provider in SendQuick Cloud. This is depicted in interface below.
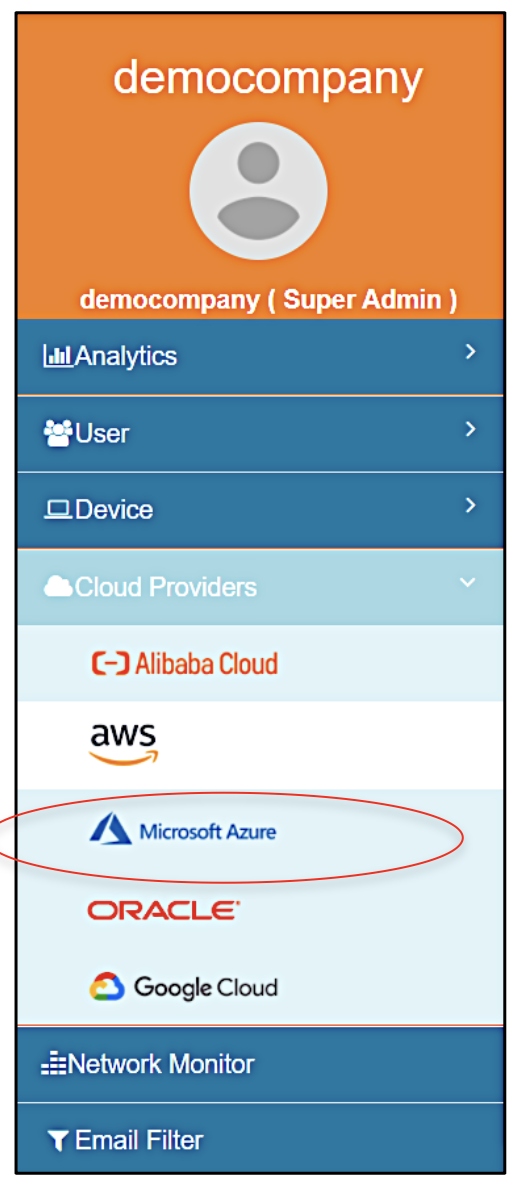
Figure 5: SendQuick Cloud Menu (left)
Chose the Cloud Provider as shown on the left Menu in the diagram above.
Copy the Integration URL as shown on the top of the Integration page. This is the URL to be configured in Azure Action as shown in section 4.0.
In Azure, the first configuration is to configure the Manage Actions, creating the recipient list to receive the notifications. Since SendQuick Cloud is used to manage the recipients on the different channels, you just need to configure one (1) email in Manage Actions for Azure. This is explained below.
3.1 Configure Email and Webhook for SendQuick Cloud in Azure Manage Actions
On the main page of Azure, select Alerts and Manage Actions. These are shown in the Figures below.
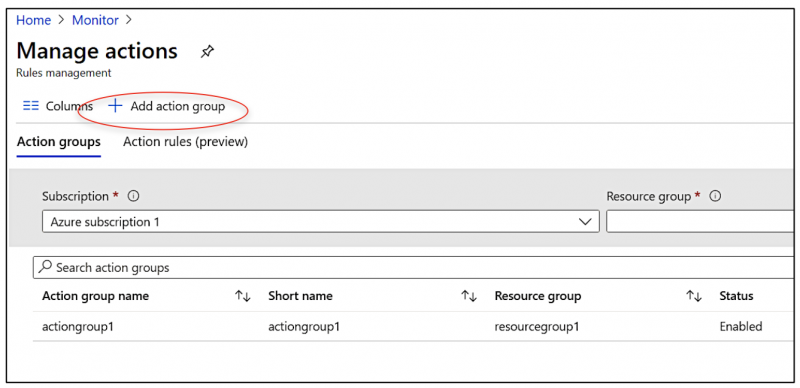
Select Add Action Group and you will see the interface as below.
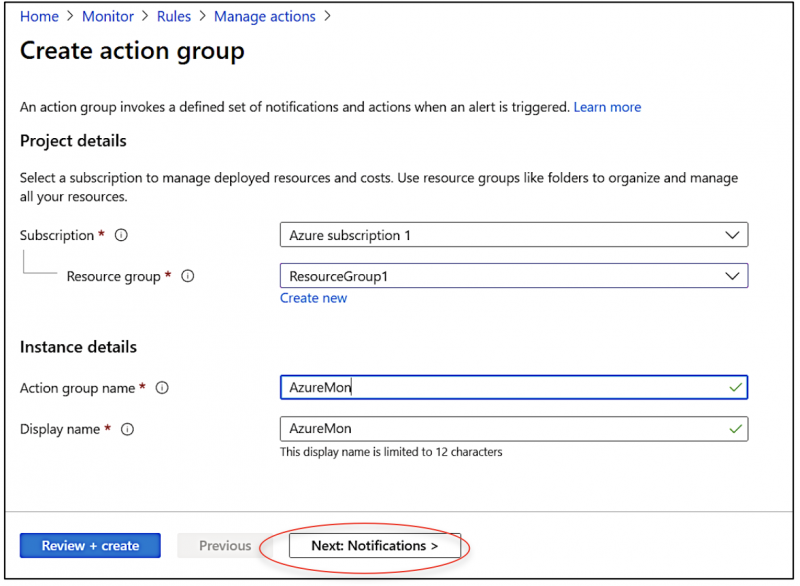
Complete the required information in Project Details and give the action a name. Then select Next Notification to configure notifications as shown below.
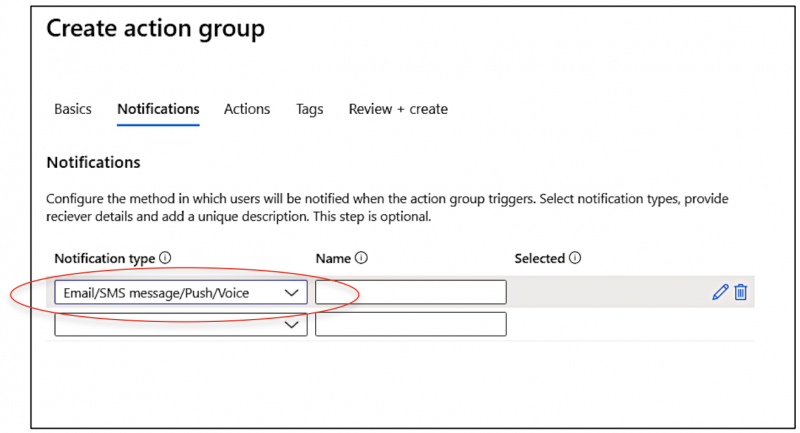
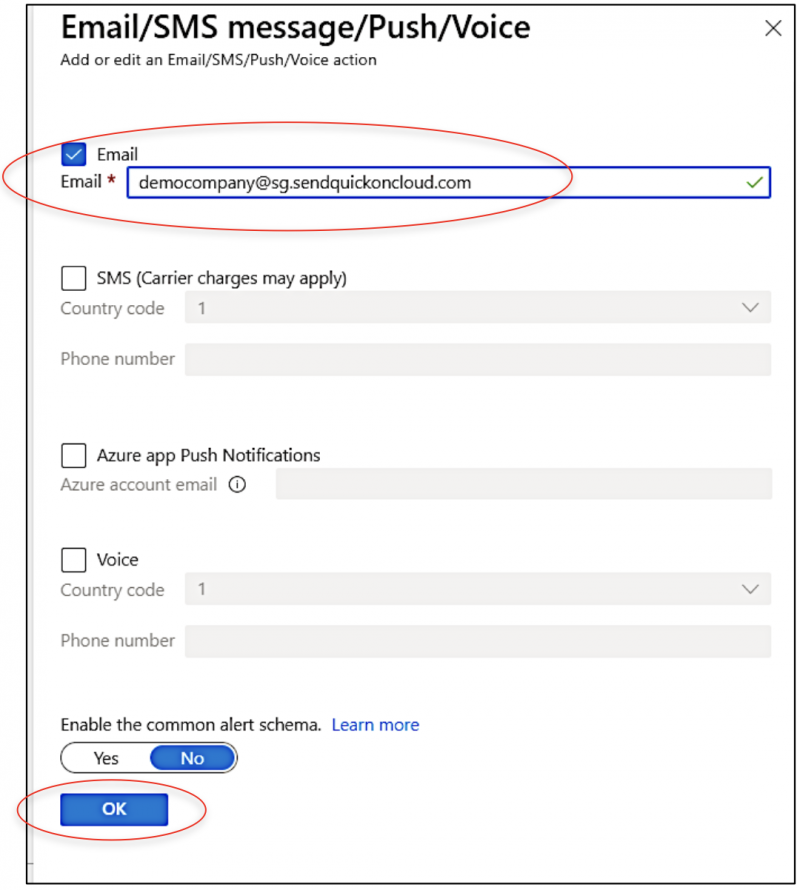
Select Email/SMS/Push/Voice and insert the email from SendQuick Cloud into the Email text box as below. Select the Email check list as shown. The select OK.
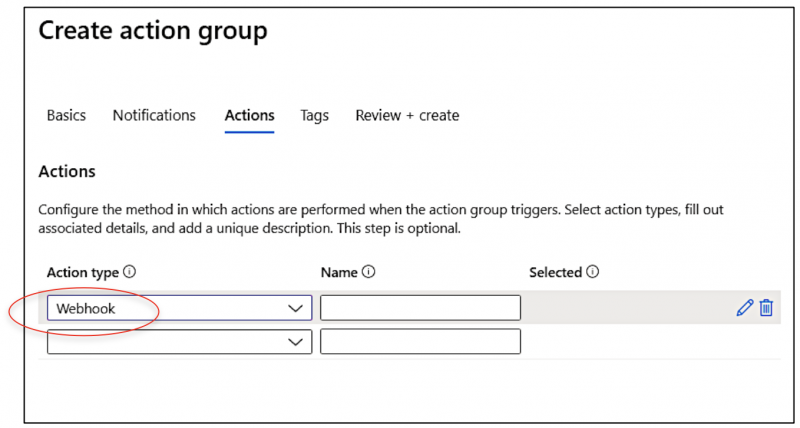
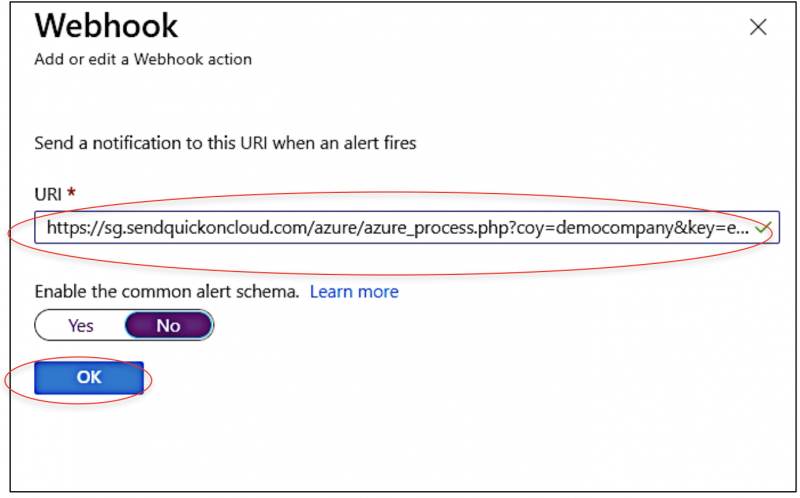
In the Actions section, select Webhook and then enter the URL (from SendQuick Cloud) in Section 2.2 above into the URI text box and select OK. These are shown in the three images below.
Once completed, you will then proceed to configure the Alert Rules. You may be required to verify the email (provided by sendQuick) to activate the emails.
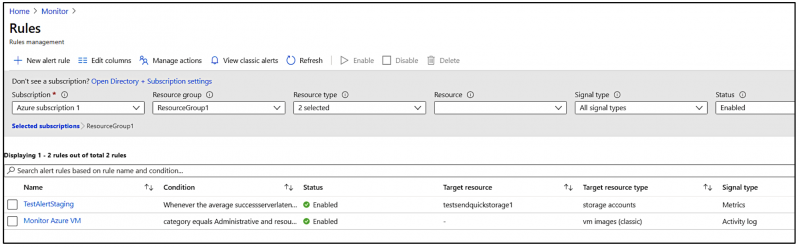
Select Alert Rules and Create Alert Rule and you will see the interface to configure the rule as below.
Select and assign the desired resources, Resources and Conditions and once completed, the resources and conditions are selected as shown in the next Figure.
Then, proceed to Select Action Group, to specify the desired actions to send messages for this rule.
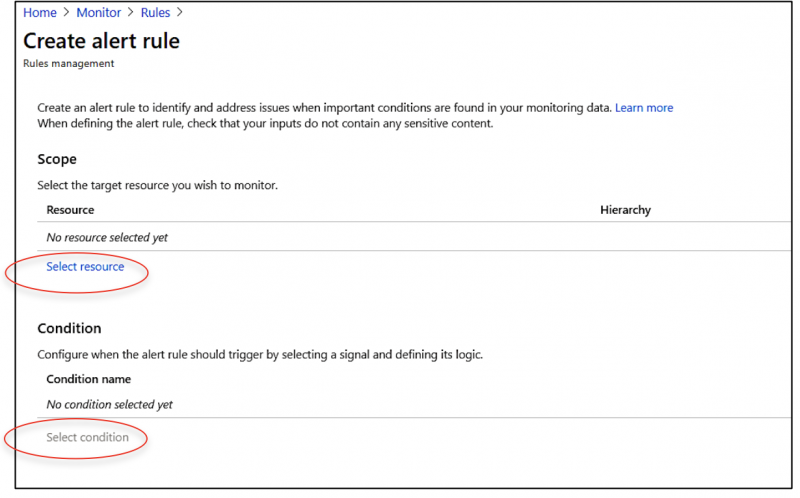
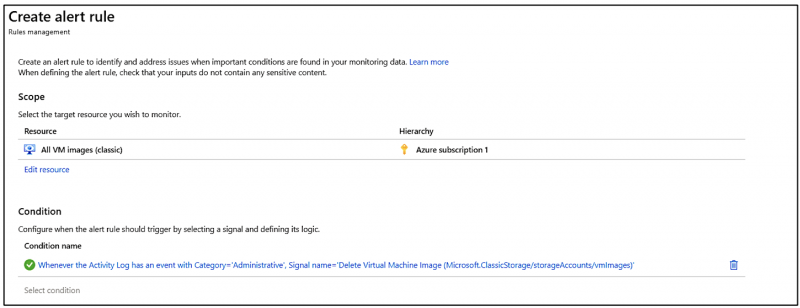
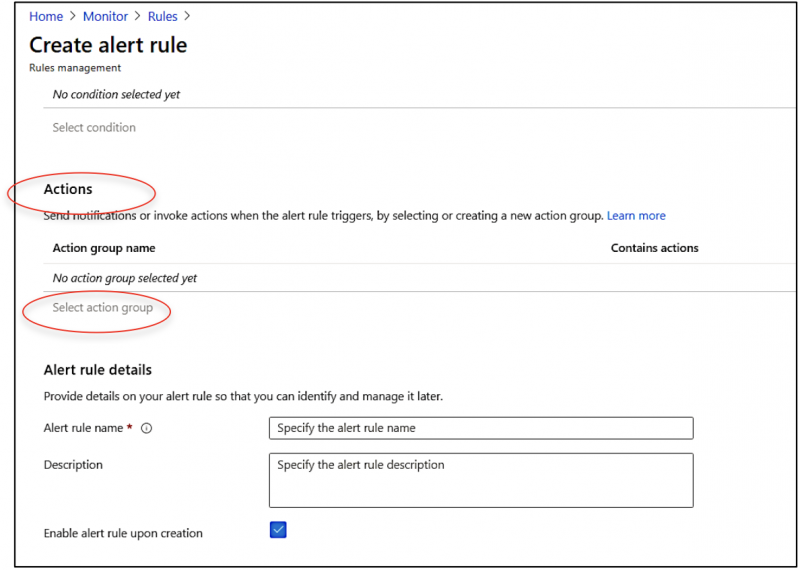
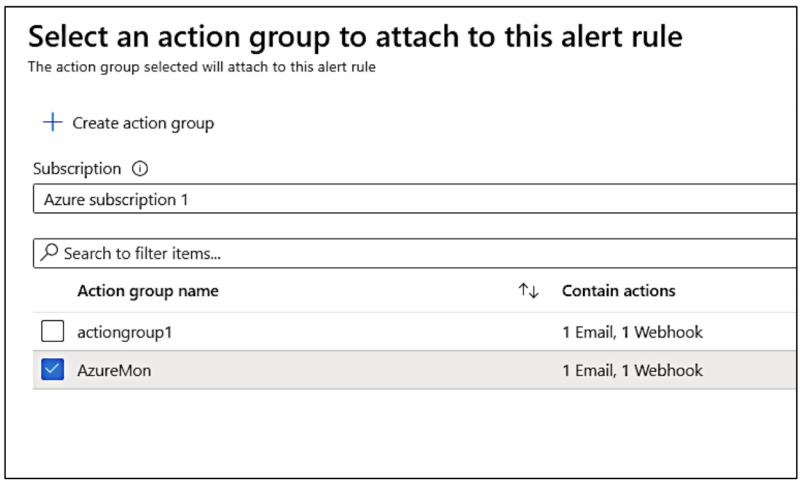
Figure 16: Select Action Group for the Rule
Once selected the Action Group and Select, you can complete the rule with the Description and then Save at the top of the rule. This completes the creation of a rule in Azure Monitor.
The rule is ready to use and will send via Email and webhook (or any combination) based on the Rule Actions configured in Section 3.1 above.
You can create more rules, as desired and use either Email or webhook to send the notifications to SendQuick Cloud.
Upon completion, you can start using SendQuick Cloud and configure all the filter/policies and user roster to receive the alerts on their phones. For more SendQuick Cloud configuration, refer to SendQuick Cloud User Manual or Video Tutorial.